| Chapter 4. Menu Bar | ||
|---|---|---|
 |  | |
| Chapter 4. Menu Bar | ||
|---|---|---|
| | | |
Table of Contents
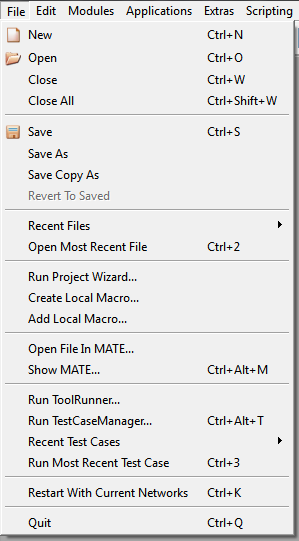
Opens an existing MeVisLab network
from file (extension .mlab).
Alternatively, the .mlab file can be dragged onto the workspace to open it in a new network window.
Some other file types may also be opened directly by dragging them onto the workspace (no network needs to be open for that):
A dragged image file (like .dcm, .tif, .png, etc.) creates an ImageLoad module which automatically loads the file.
A dragged file readable by WEM modules (like .wem, .off, .obj, .ply, etc.) creates a WEMLoad module which automatically loads the file. See the HTML help for the WEMLoad module for more information.
A dragged file readable by CSO modules (typically .cso) creates a CSOLoad module which automatically loads the file.
Saves the current network.
For saved networks, the AutoSave files are discarded. See Section 4.3.1, “Preferences — General” .
Writes the current network to file with a new name.
For saved networks, the AutoSave files are discarded. See Section 4.3.1, “Preferences — General” .
Reverts to the last saved version of the current network. (Option is only available if network was changed.)
Allows selecting recently opened network from file. The maximum number of recent files is twenty. The list of recent files is not deleted upon installing a new version of MeVisLab. For more information about storing preferences, see Section 4.3, “Preferences”.
Opens the most recent network file. This function can be triggered with a keyboard shortcut, see Section 4.3.10, “Preferences — Shortcuts”.
Starts a wizard for creating new modules, packages and installers (ADK license required for the latter). See Chapter 25, Project Wizard.
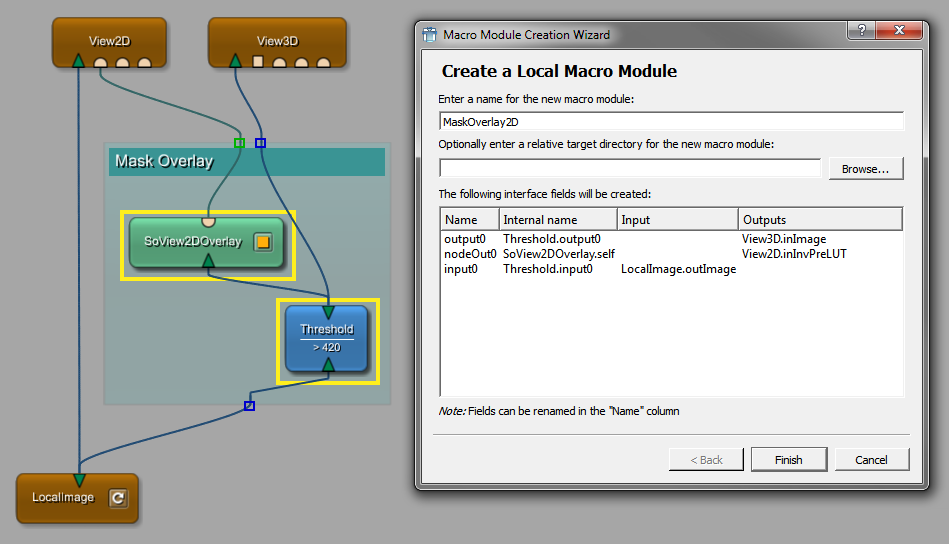
Creates a new macro module locally to the current network path, based on the currently selected modules or a module group, see Section 3.11.2, “Editing, Converting, and Deleting Groups”. The necessary inputs and outputs will be added automatically. The display names of interface fields can be changed but not the internal names.
Locally defined macro modules may be used in complex networks to encapsulate sub-networks as independent functional units with a defined interface to other network components. This way they carry out an application-specific function which would not be of use for any other application. Therefore they are not added to the common MeVisLab module database, i.e. they are not declared in a .def file.
The following items are created:
the files <ModuleName>.script and
<ModuleName>.mlab
in the current network path directory
the new local macro module on the current network workspace
![[Note]](images/note.png) | Note |
|---|---|
A local macro module is not available in the MeVisLab module
database, as no To differentiate local macros from global macros, "./" is prepended to the module name/type in the network view to hint at the fact that this module only exists relative to the location of the network file. |
| Note |
|---|---|
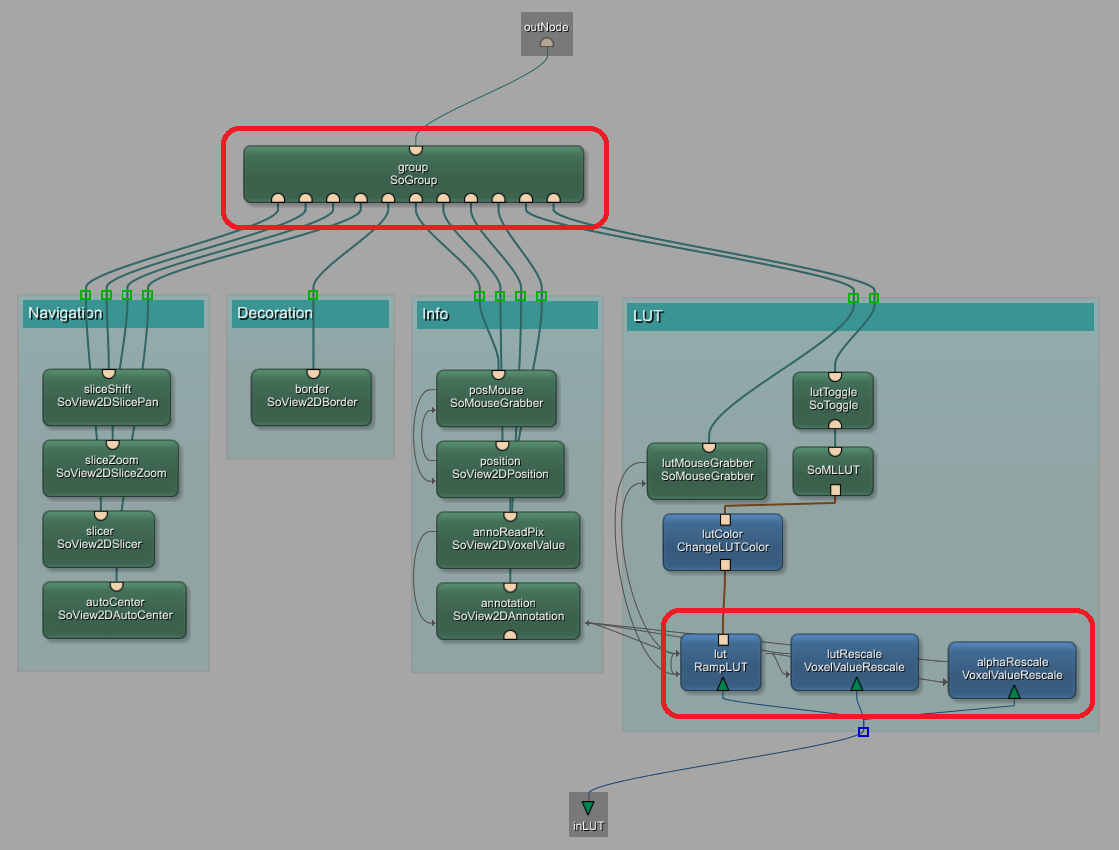
During the conversion to local macro, modules need to be disconnected and reconnected. Connections that are set by script, i.e., forwarded from an outer macro, cannot be disconnected, so an alert will be issued: “Unable to remove the module [module name] with connections set by script.”. A similar alert is issued when trying to remove a module connected like this. In the next figure, modules within a red rectangle can neither be deleted, disconnected from the inputs/outputs, or added to a local macro. |
For an introduction on macros, read Getting Started, chapter “Introduction to Macro Modules”.
Adds a locally defined local macro module to the current network, see Section 4.1.12, “Create Local Macro”. Choose the <ModuleName>.script file in the file dialog to add the local macro module. The local macro needs to be defined in the same folder as the network it should be added to, or in a sub-folder of this folder.
Opens MATE with a file dialog in which one or more files can be opened, see Chapter 26, MATE.
Opens MATE without files, see Chapter 26, MATE.
Starts the ToolRunner, see the ToolRunner documentation.
Starts the TestCaseManager of the TestCenter, see the TestCenter Reference and the Getting Started, chapter 16, “Using the TestCenter”.
Lists the last test cases that have been run from the TestCaseManager. Selecting an entry from this list will open the TestCaseManager and run the selected test case.
This will open the TestCaseManager and run the top-most entry of the recent test cases list.
Restarts MeVisLab with all networks currently opened. This is necessary for a complete DLL update and useful when developing new ML and Inventor modules. Alternatively, you can press a shortcut to restart MeVisLab with the current network. Refer to Section 4.3.10, “Preferences — Shortcuts”.
| Note |
|---|---|
MeVisLab restarts in the same mode as it was started originally, regarding the |
© 2023 MeVis Medical Solutions AG
| | | |
| 3.17. Network Mouse Gestures |  | 4.2. Edit Menu |